
If I’ve learnt anything as an Engineer over 13+ years, it’s this: it’s a process of intentional iteration, not random.
This way of thinking and problem solving drives everything I do.
If you’ve ever tried to generate layers consistently using snappyHexMesh (SHM), you’ll know why it’s a common challenge, especially getting good locality, thickness and distribution.
In general, you’re up against 50+ parameters across the three processing stages, a heap of potential errors and generally speaking, one stage leads to another, so success matters along the way.
I’ve been trying to make it easier to understand and work with SHM for a while now, through experiments and a variety of previous posts earlier this year. Take a look:
What’s the need for layers anyway?
I like to go back to the fundamentals and remind myself (and you) of them.
You see, most of the interesting physics happens close to surfaces.
You can use “wall functions” but they’re approximations of how the fluid behaves. I’ve written about this before.
Layers in a mesh increase the local resolution near walls and resolving the fluid behaviour, hence any form of heat transfer, turbulence and other wall-affected physics can be captured.
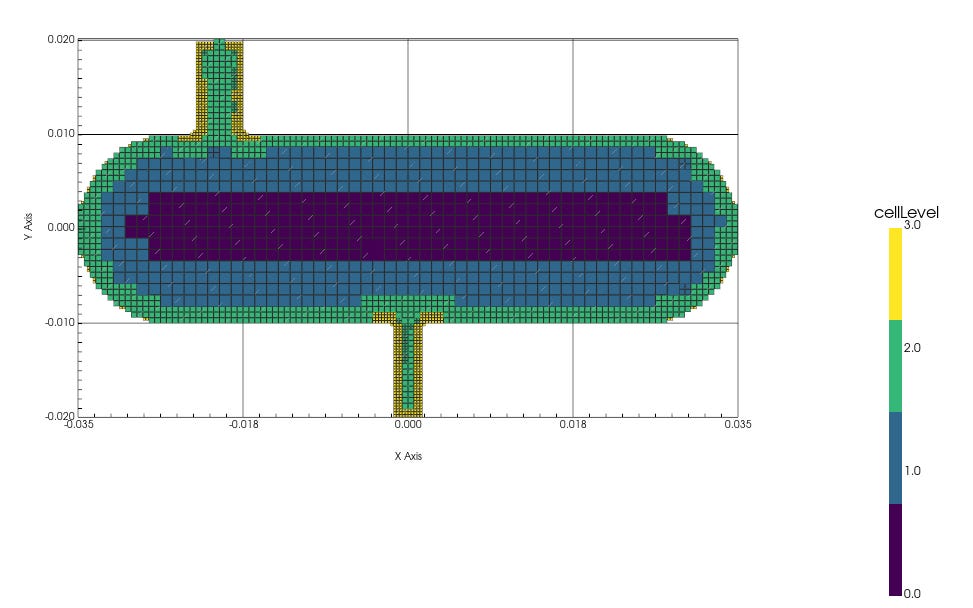
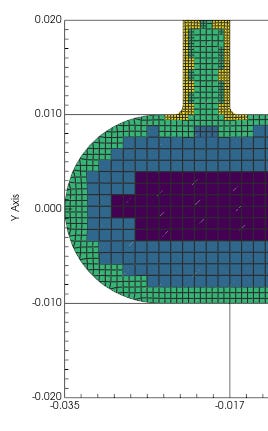
Predicting layer success
The layer generation algorithm is sensitive to cell sizing.
And this is a product of both the Base mesh cell size and cell refinements.
Let me explain.
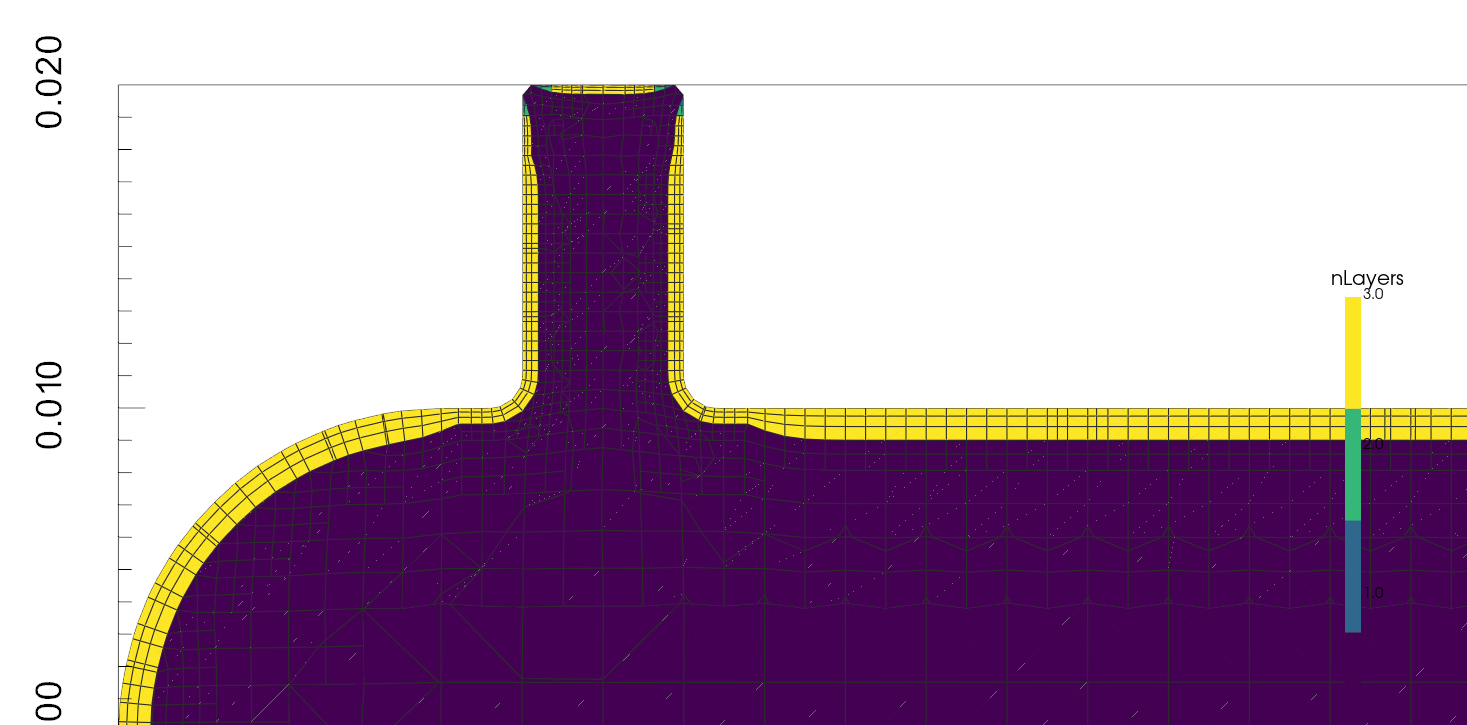
When you refine cells you get something like this:
Next comes the snapping stage – the vertices (points) are pulled from the “stepped” mesh in or out in the direction to a smooth result:
This very action results in shrinking, stretching and skewing, particularly of the boundary cells, which can be seen at the boundary above.
In other words, the size (and area) of the cells change.
And the aspect ratio of the boundary cells is now distorted.
This makes perfect sense as two of the three stages of SHM are sequential in the algorithm, but it means that the layer algorithm has to deal with imperfect cell sizes, to try and grow the number of layers, at the sizes you’ve requested!
My results
They’re promising (still getting recession and collapse in typically-challenging regions) and I’m still testing it on other geometry, before sharing the full, specific steps I use to get consistent layers, regardless of the geometric complexity.
The screenshots of the resulting mesh is from a tool I’ve been building, that allows me to inspect the resulting mesh with more accuracy and intention.
Stay tuned and connected for updates on this.
If you like what I’m doing here, consider supporting me by upgrading your subscription and access more resources.
See you soon. 👋
Nasser